

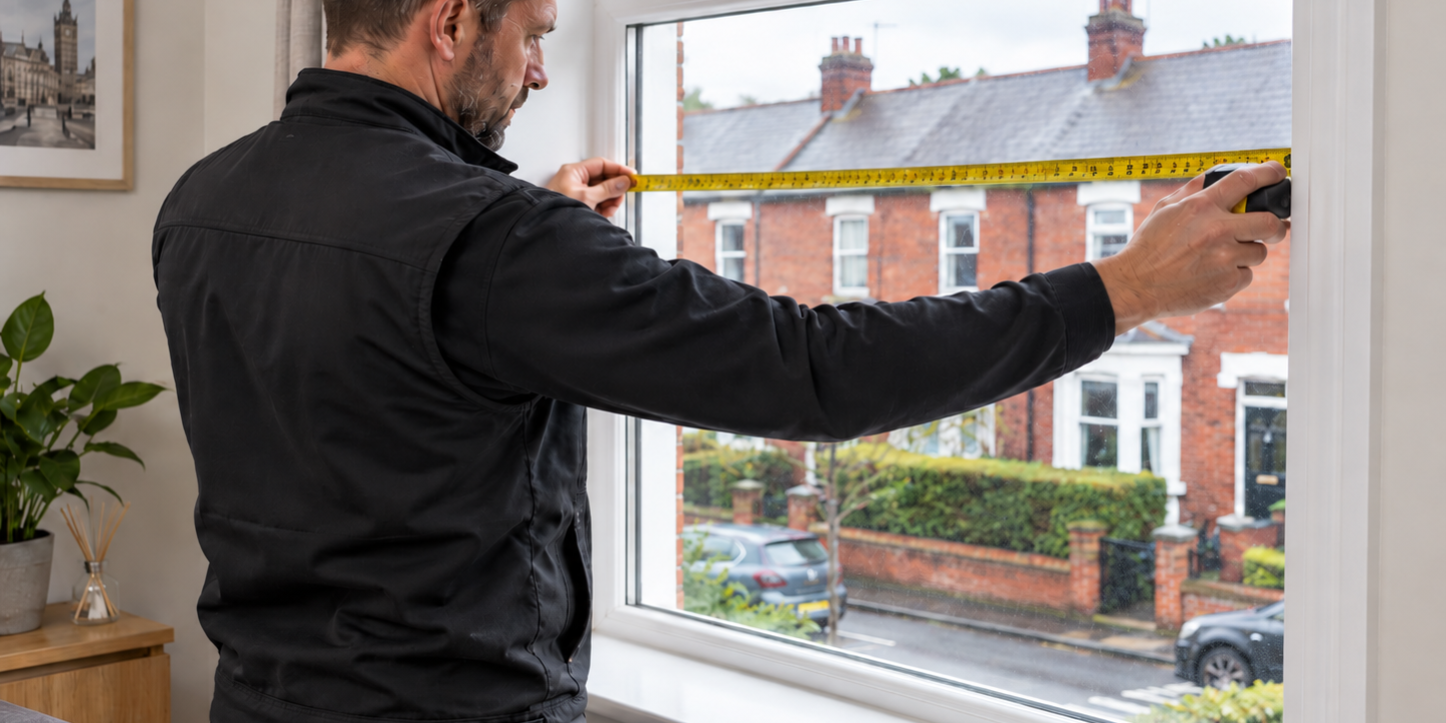
How to Measure for Replacement uPVC Windows: A Supply-Only Guide
Accurate measurements are essential when ordering made-to-measure replacement uPVC windows. A frame manufactured too large may not fit the aperture, while one manufactured unnecessarily small can leave excessive installation gaps and make fitting and finishing more difficult.
However, measuring for a replacement window involves more than taking one width and one height. The opening should be measured in several places, checked for squareness, inspected for concealed frame areas and assessed for the appropriate fitting clearance before a manufacturing size is confirmed.
This guide explains how to measure for replacement uPVC windows and incorporates good-practice principles from the Glass and Glazing Federation’s Window and Door Good Practice Guide, which reflects BS 8213-4:2016.
If you are replacing several windows, it is also worth reviewing the different types of replacement windows available before finalising the opening configurations and specifications.
Important: The dimensions recorded during a site survey are not automatically the dimensions that should be sent for manufacture. The aperture, fitting clearance, cill arrangement, reveals and installation conditions all need to be considered before the final manufacturing dimensions are confirmed.
How Do You Measure for a Replacement uPVC Window?
For a typical replacement window, measure the opening in three places across the width and three places through the height.
Record every measurement in millimetres and identify the smallest width and smallest height.
You should then:
- check the opening diagonally for squareness;
- inspect the internal and external reveals;
- establish the existing and proposed cill arrangement;
- identify any concealed parts of the frame;
- check the condition of the opening;
- determine the appropriate fitting clearance; and
- confirm the final manufacturing dimensions before ordering.
The basic process is:
Measure the aperture → check squareness → inspect the reveals and cill → establish the fitting clearance → confirm the manufacturing size → confirm the window specification.
Opening Size and Manufacturing Size Are Not the Same Thing
One of the most important parts of ordering supply-only windows is understanding exactly what has been measured.
Several different dimensions can relate to the same window.
Glass size
The glass size is simply the size of the glazed unit inside the frame.
It should not be used as the basis for ordering an entire replacement window.
Existing frame size
The dimensions of the existing frame can provide useful information during a survey, but copying those dimensions is not necessarily correct.
The existing window may:
- extend behind plaster or render;
- sit within a check reveal;
- contain frame extensions or add-ons;
- have been installed with excessive or inadequate clearance;
- incorporate a different cill arrangement; or
- have been incorrectly sized originally.
Structural opening or aperture size
This is the opening within the building into which the replacement frame is to be installed.
The complete structural opening may not always be visible while the existing window remains in place.
Manufacturing size
The manufacturing size is the final overall frame dimension after the appropriate installation allowances have been applied.
This is ultimately the size the fabricator will manufacture.
The important distinction is:
Structural opening → survey measurements → installation assessment → manufacturing dimensions.
A survey dimension should not automatically be treated as the manufacturing dimension.
What Do You Need to Measure a Replacement Window?
For a straightforward survey, you will normally need:
- a reliable tape measure;
- a spirit level;
- a pencil or marker;
- a survey sheet, notebook or tablet;
- a calculator;
- a camera or smartphone;
- appropriate access equipment where required.
Record dimensions in millimetres.
For multiple windows, assign every opening a reference such as:
W01, W02, W03, W04
This allows the measurements to be matched accurately with the window style, glazing, hardware, colour and opening configuration later.
The GGF guidance also recommends keeping photographic records where appropriate. Photos can be particularly useful when unusual cills, reveals, brickwork or structural details need to be reviewed before manufacture.
Step 1: Measure the Width in Three Places
Measure the aperture horizontally in three places:
- across the top;
- through the middle; and
- across the bottom.
Do not assume all three dimensions will be identical.
Older buildings in particular can contain tapered or distorted openings.
For example:
| Position | Aperture width |
|---|---|
| Top | 1207 mm |
| Middle | 1204 mm |
| Bottom | 1201 mm |
The smallest measured width is therefore:
1201 mm
The GGF good-practice guidance uses the smallest recorded width and height when determining the manufacturing dimensions.
Do not simply average the three measurements.
If you averaged the dimensions above, you would arrive at approximately 1204 mm. That figure would be greater than the narrowest part of the aperture.
Recording all three measurements also helps identify whether the opening is tapered or irregular.
Step 2: Measure the Height in Three Places
Next measure the opening vertically at:
- the left;
- the centre; and
- the right.
For example:
| Position | Aperture height |
|---|---|
| Left | 1053 mm |
| Centre | 1050 mm |
| Right | 1048 mm |
The smallest measured height is:
1048 mm
Again, keep all three dimensions on your survey rather than recording only the smallest.
The difference between the measurements provides useful information about the condition of the aperture.
Particular care is required around the bottom of the opening because the dimension may be affected by:
- an existing uPVC cill;
- a stone or concrete sill;
- mortar;
- sealant;
- frame extensions;
- tiles; or
- other construction details.
Step 3: Check Whether the Window Opening Is Square
Width and height measurements do not tell you everything about an aperture.
An opening can have apparently sensible width and height dimensions while still being significantly out of square.
Measure diagonally:
top left to bottom right
and then:
top right to bottom left
Compare the two dimensions.
The closer the diagonal measurements are, the squarer the opening is likely to be.
The GGF survey checklist uses a useful reference point when assessing an aperture. It asks whether the opening is square and even to within:
- 5 mm across the height and width measurements; and
- 10 mm across the diagonal measurements.
If the opening falls outside these parameters, investigate the reason rather than simply applying a standard size deduction and proceeding with the order.
Where appropriate, use a spirit level to check:
- the left and right jambs;
- the head of the opening; and
- the base.
A replacement window should not be expected to compensate automatically for a badly distorted structural opening.
Step 4: Inspect the Internal and External Reveals
The visible opening around an existing window does not always represent the complete structural aperture.
Measure and inspect the window from both the inside and outside where practical.
Look for:
- plaster covering the frame;
- external render;
- brickwork returns;
- tiles;
- trims;
- sealant;
- cladding;
- packers;
- frame extensions; and
- sections of frame disappearing behind the surrounding construction.
The GGF guidance specifically highlights the importance of comparing the internal and external reveal dimensions.
You should also check that plaster, render, tiles or other finishes will not interfere with the operation of the replacement window.
What Is a Check or Reverse-Brick Reveal?
A check reveal, sometimes described as a reverse-brick or rebated opening, occurs where the external opening is smaller than the opening further inside the wall.
Part of the window frame therefore sits behind the external masonry.
If you only measure the visible outside opening, you may underestimate the actual frame dimensions.
If the external dimensions are noticeably smaller than the dimensions measured internally, investigate whether a check reveal is present.
You need to establish how much of the existing frame sits behind the brickwork before confirming the replacement size.
Older box-sash windows are another situation where a considerable part of the frame may be concealed.
If the true aperture cannot be established confidently while the existing window remains in place, further investigation or a professional survey is preferable to estimating the hidden dimensions.
Step 5: Check the Window Cill
The cill arrangement should be established before confirming the manufacturing height.
A property may have:
- a projecting uPVC sub-cill;
- a stone sill;
- a concrete sill;
- a tiled sill; or
- another structural or decorative detail.
First establish what is being removed and what will remain.
Where a new sub-cill is required, GGF good-practice guidance recommends that it provides an adequate overhang of at least 25 mm from the face of the building.
The survey should also establish:
- the required cill projection;
- whether horns are required;
- how the cill interfaces with render or plaster;
- whether making good will be necessary; and
- whether a sealant or mortar bed needs to be considered in the height calculation.
This is another reason why simply copying the dimensions of the old window can result in an incorrect replacement size.
Step 6: Establish the Correct Fitting Clearance
This is one of the areas where online measuring guides can become misleading.
You will often see instructions telling people to:
“Measure the opening and subtract 10 mm.”
There is some basis for that figure, but 10 mm is not a universal deduction for every uPVC window.
The GGF Window and Door Good Practice Guide provides recommended total deductions based on the frame material and overall dimension.
For PVC-U frames, the guidance gives:
| Frame material | Up to 1.5 m | 1.5 m–3.0 m | 3.0 m–4.5 m | Over 4.5 m |
|---|---|---|---|---|
| White PVC-U | 10 mm | 10 mm | 15 mm | 20 mm |
| Non-white PVC-U | 15 mm | 15 mm | 22 mm | 28 mm |
These figures are total deductions from the relevant width or height. They are not deductions per side.
For example:
A 10 mm total width deduction does not mean subtracting 10 mm from the left and another 10 mm from the right.
It means 10 mm is deducted from the overall aperture width.
The GGF guidance also requires consideration to be given to:
- movement of the frame material;
- tolerances within the building opening;
- the size of the window;
- the surrounding construction; and
- any sealant or mortar bed beneath a sub-cill when calculating the height.
This is particularly relevant to coloured PVC-U frames, where the recommended allowances differ from those for white PVC-U.
Worked Example: From Aperture Measurements to Manufacturing Size
Suppose a white PVC-U replacement window has the following survey measurements.
Width
| Position | Measurement |
|---|---|
| Top | 1210 mm |
| Middle | 1207 mm |
| Bottom | 1204 mm |
The smallest width is:
1204 mm
Height
| Position | Measurement |
|---|---|
| Left | 1055 mm |
| Centre | 1052 mm |
| Right | 1050 mm |
The smallest height is:
1050 mm
Both controlling dimensions are below 1.5 metres.
Using the GGF recommended deduction for a white PVC-U frame in this size range gives a starting total deduction of 10 mm.
This produces:
| Dimension | Calculation | Result |
|---|---|---|
| Width | 1204 − 10 mm | 1194 mm |
| Height | 1050 − 10 mm | 1040 mm |
However, that does not automatically mean the window should be ordered at 1194 × 1040 mm.
Before the manufacturing size is confirmed, you still need to consider:
- the cill;
- any sealant or mortar bed;
- check reveals;
- plaster and render;
- add-on profiles;
- the condition of the opening; and
- the intended installation method.
The example demonstrates how the clearance calculation works.
The complete survey determines whether that calculation represents the correct manufacturing dimensions for the actual installation.
Step 7: Check the Structural Support Above the Window
A replacement window should not simply be assumed to carry the structure above the opening.
The GGF survey guidance specifically asks whether structural loads are being carried by the building rather than the window or doorset.
During the survey, look for signs such as:
- cracking above the opening;
- visible movement;
- deflection;
- distorted existing frames;
- unusual masonry arrangements; or
- uncertainty regarding the lintel.
Where the structural support is uncertain, the opening should be assessed by someone suitably competent before the existing window is removed or the replacement specification is finalised.
This is particularly important with bay windows because structural loads may be transferred through bay poles and other supporting components.
Do not assume that fitting a stronger replacement frame resolves an underlying structural problem.
Step 8: Record the Window Configuration
Once the dimensions are established, record exactly how the replacement window needs to operate.
A simple drawing can often communicate the configuration more clearly than written instructions alone.
Record:
- fixed sections;
- opening sections;
- side-hung openers;
- top-hung openers;
- handing;
- mullion positions;
- transom positions; and
- any restricted-opening requirements.
The required configuration can also vary according to the window system.
For example, standard uPVC double glazed windows, tilt and turn windows and REHAU Rio flush casement windows all have different design and opening considerations.
Make it clear whether any drawing is being viewed:
from inside or from outside.
Do not assume everyone involved in the order will interpret an opening diagram the same way.
The GGF guidance also highlights the importance of checking that openers, hinges and ventilation will not be obstructed by plaster, render or surrounding finishes.
Step 9: Record the Complete Window Specification
Correct dimensions are only one part of a replacement-window order.
Before requesting a quotation, record the complete specification for each frame.
That may include:
- confirmed manufacturing width;
- confirmed manufacturing height;
- quantity;
- window style;
- opening configuration;
- handing;
- internal colour;
- external colour;
- glazing specification;
- obscure glass requirements;
- safety glass requirements;
- ventilation;
- hardware;
- locking requirements;
- cills;
- frame extensions or ancillary profiles; and
- relevant project-specific requirements.
For installers and builders ordering regularly, our trade windows service is designed around made-to-measure frames manufactured against an agreed specification.
For several windows, a schedule makes it considerably easier to manage the project.
Example Window Schedule
| Ref | Manufacturing Size | Configuration | Colour | Glazing | Ventilation | Cill / Add-ons |
|---|---|---|---|---|---|---|
| W01 | Confirmed W × H | Casement | White | Double glazed | As specified | 150 mm cill |
| W02 | Confirmed W × H | Fixed / opener | Anthracite Grey | Double glazed | As specified | Confirm |
| W03 | Confirmed W × H | Casement | White | Obscure where required | As specified | None |
Using consistent references means your:
survey → drawings → quotation → manufacturing schedule
can all refer to the same openings.
GGF-Aligned Checks to Make Before Ordering
Measuring the aperture is only one part of a competent replacement-window survey.
Before an order is finalised, consider:
- the general condition of the aperture;
- damp or cracking;
- structural support;
- the lintel;
- squareness;
- the cill arrangement;
- drainage;
- internal and external reveals;
- concealed frame areas;
- ventilation;
- opening direction;
- hinges;
- hardware;
- product size limitations;
- safe access;
- proposed fixing methods; and
- making good after installation.
For unusual openings, taking photographs alongside the measurements can make it considerably easier to discuss the detail with the fabricator before the window enters production.
Measuring While the Existing Window Is Still Installed
Most replacement windows are surveyed before the original window is removed.
This means some parts of the structural opening may still be concealed.
Measure from both inside and outside where practical.
Compare:
- external brickwork;
- internal plaster lines;
- render;
- the existing frame position;
- trims;
- cills; and
- visible frame extensions.
If the existing frame disappears significantly behind brickwork, plaster or render, do not assume the visible frame edge represents the true aperture.
This is especially important with:
- check reveals;
- reverse-brick openings; and
- older box-sash installations.
Where a hidden part of the opening could materially affect the manufacturing size, investigate it rather than relying on an estimate.
Can You Just Measure the Existing Window Frame?
The existing frame should normally be measured as part of the survey, but it should not automatically determine the size of the replacement.
The original window might:
- have been manufactured too small;
- have been fitted too tightly;
- contain add-on profiles;
- sit behind the visible reveal;
- use a different cill arrangement; or
- have been installed differently from the proposed replacement.
Think of the existing frame as useful evidence.
The objective is not necessarily to reproduce its external dimensions.
The objective is to manufacture a replacement frame that correctly suits the actual structural opening and proposed installation.
Common Replacement Window Measuring Mistakes
Measuring the glass instead of the aperture
The dimensions of the visible glass do not establish the size required for a complete replacement frame.
Measuring only once
Apertures are not always square or parallel.
Measure the width and height in at least three locations.
Averaging the measurements
Do not average the measurements to establish the controlling aperture dimension.
Use the narrowest dimension when determining the manufacturing size.
Automatically subtracting 10 mm
The GGF recommendations vary according to frame colour/material and overall dimension.
A universal 10 mm deduction is an oversimplification.
Subtracting 10 mm from each side
The GGF table specifies total deductions from the width or height, not a deduction from every edge.
This distinction is important.
Ignoring coloured PVC-U movement
Non-white PVC-U has different recommended clearances to white PVC-U within the GGF guidance.
Ignoring the cill
The cill arrangement can materially affect the manufacturing height.
Missing a check reveal
A section of the frame may sit behind the external brickwork, making the visible outside opening smaller than the actual frame.
Ignoring structural support
The replacement frame should not simply be assumed to support the masonry or other building loads above it.
Mixing measurement units
Record dimensions consistently in millimetres.
Forgetting the opening configuration
A correctly sized window manufactured with the wrong handing or opener arrangement is still the wrong window.
Ordering from approximate dimensions
Made-to-measure products should be manufactured from confirmed dimensions, not rough survey estimates.
When Should You Get a Window Professionally Surveyed?
Straightforward rectangular openings can be relatively simple for an experienced installer or builder to measure.
More complicated situations deserve additional investigation.
This includes:
- bay windows;
- bow windows;
- arched windows;
- shaped frames;
- severely out-of-square apertures;
- structural cracking;
- uncertain lintels;
- complicated check reveals;
- extensive render or cladding;
- coupled frames;
- unusual cill arrangements;
- concealed structural openings; and
- large or particularly heavy glazing requirements.
Where a measuring error could result in an expensive remake or significant project delay, obtaining a competent survey is preferable to guessing.
What Should You Send With a Supply-Only Window Enquiry?
Once the survey is complete and the manufacturing dimensions have been confirmed, provide enough information for the fabricator to understand the complete window rather than just its size.
For every frame, provide:
- confirmed manufacturing dimensions;
- window reference;
- quantity;
- opening configuration;
- frame colour;
- glazing specification;
- ventilation;
- hardware;
- cill requirements; and
- any project-specific requirements.
For multiple windows, a numbered schedule is normally the clearest approach.
Glass Tec manufactures trade windows for installers, builders and project customers who require made-to-measure frames manufactured against a confirmed specification.
For work across Greater Manchester, we also manufacture supply-only uPVC windows for Manchester projects to the dimensions and specification confirmed for each order.
Trade customers requiring additional window and door products can also explore our wider trade window and door range.
Providing a complete survey and specification at quotation stage allows the windows to be priced against the actual project requirements rather than approximate sizes or assumptions.
Frequently Asked Questions About Measuring Replacement Windows
How many measurements should I take for a replacement window?
Take three width measurements:
- top;
- middle; and
- bottom.
Then take three height measurements:
- left;
- centre; and
- right.
Use the smallest dimensions when determining the manufacturing size and check the aperture diagonally for squareness.
What are the GGF tolerances for checking whether an opening is square?
The GGF survey checklist asks whether an aperture is square and even to within 5 mm across the height and width measurements and 10 mm across the diagonals.
Where the variation is greater, investigate the opening rather than simply applying a standard manufacturing deduction.
Do you always subtract 10 mm when measuring a uPVC window?
No.
The GGF recommended deduction for white PVC-U dimensions up to 3 metres is 10 mm in total, but larger white frames require increased allowances.
Non-white PVC-U has greater recommended deductions.
Is the 10 mm deduction per side?
No.
The figures in the GGF table are total deductions from the overall width or height.
If the recommended deduction is 10 mm, that does not mean subtracting 10 mm from both sides.
How much should you deduct for coloured uPVC windows?
The GGF recommendations for non-white PVC-U are:
- 15 mm up to 1.5 m;
- 15 mm between 1.5 m and 3 m;
- 22 mm between 3 m and 4.5 m; and
- 28 mm above 4.5 m.
These are total deductions from the appropriate aperture dimension.
The complete installation still needs to be assessed before the manufacturing size is confirmed.
Should I measure the existing frame or the brick opening?
The structural aperture is generally more important than simply copying the dimensions of the existing frame.
However, the old frame should still be measured and inspected because it provides useful information about how the previous installation relates to the opening.
What is a reverse-brick or check reveal?
A check reveal is an opening where the external face is smaller than the opening further inside the wall.
This allows part of the frame to sit behind the external masonry.
The concealed section needs to be understood before the replacement manufacturing size is confirmed.
How far should a replacement window cill project?
Where a replacement sub-cill is required, GGF good-practice guidance recommends an adequate overhang of at least 25 mm from the face of the building.
The actual cill size still needs to suit the property and installation.
Can I order a new window using the measurements of my existing frame?
Not automatically.
The existing frame may contain extensions, sit behind finishes or have been manufactured with a different fitting allowance.
Establish the structural opening and intended installation before confirming the new manufacturing dimensions.
Can I measure a replacement window before removing the old one?
Yes.
Most replacement windows are surveyed while the old frame is still installed.
However, you need to consider areas concealed behind plaster, render, brickwork and trims.
Can I measure a bay window using the same method?
A bay window requires additional consideration.
Angles, coupling arrangements, projections and structural loads can all affect the replacement specification.
Where structural loads pass through bay poles or other elements, the replacement needs to be assessed accordingly.
Accurate Measurements Before Manufacture
A good replacement-window survey establishes much more than a nominal width and height.
Measure the opening in three places horizontally and vertically. Record all the dimensions and use the smallest measurements when determining the manufacturing size.
Check the diagonals.
Inspect both the internal and external reveals.
Determine whether the frame sits within a check reveal.
Confirm the cill arrangement.
Check that the building provides the appropriate structural support.
Then apply the appropriate fitting allowance and confirm the final manufacturing dimensions.
For supply-only uPVC windows, that distinction is particularly important because the fabricator manufactures the frame against the dimensions and specification provided with the order.
Getting the survey right before manufacture reduces uncertainty, helps prevent costly sizing mistakes and gives the installer a properly specified product to work with on site.


